
HOW TO PUT YOUR BIKE ON A TRAINER AND MAKE THE MOST OF INDOOR RIDING
With colder weather and shorter days, many of us are forced to retreat inside to ride our bikes during the winter. Fortunately, we’ve entered a golden age of smart trainers and virtual riding platforms, so indoor cycling isn’t the miserable slog it used to be. In fact, it’s one of the best ways to make significant gains in your on-bike fitness.
With all the fancy tech on the market, setting up your bike to ride inside can feel a bit complicated. We’ll provide a few tips on how to install your bike on a stationary trainer, how to set up your “trainer dungeon” to enhance your riding experience, and how to care for your bike when riding inside.
How to Install Your Quintana Roo Bike on an Indoor Trainer
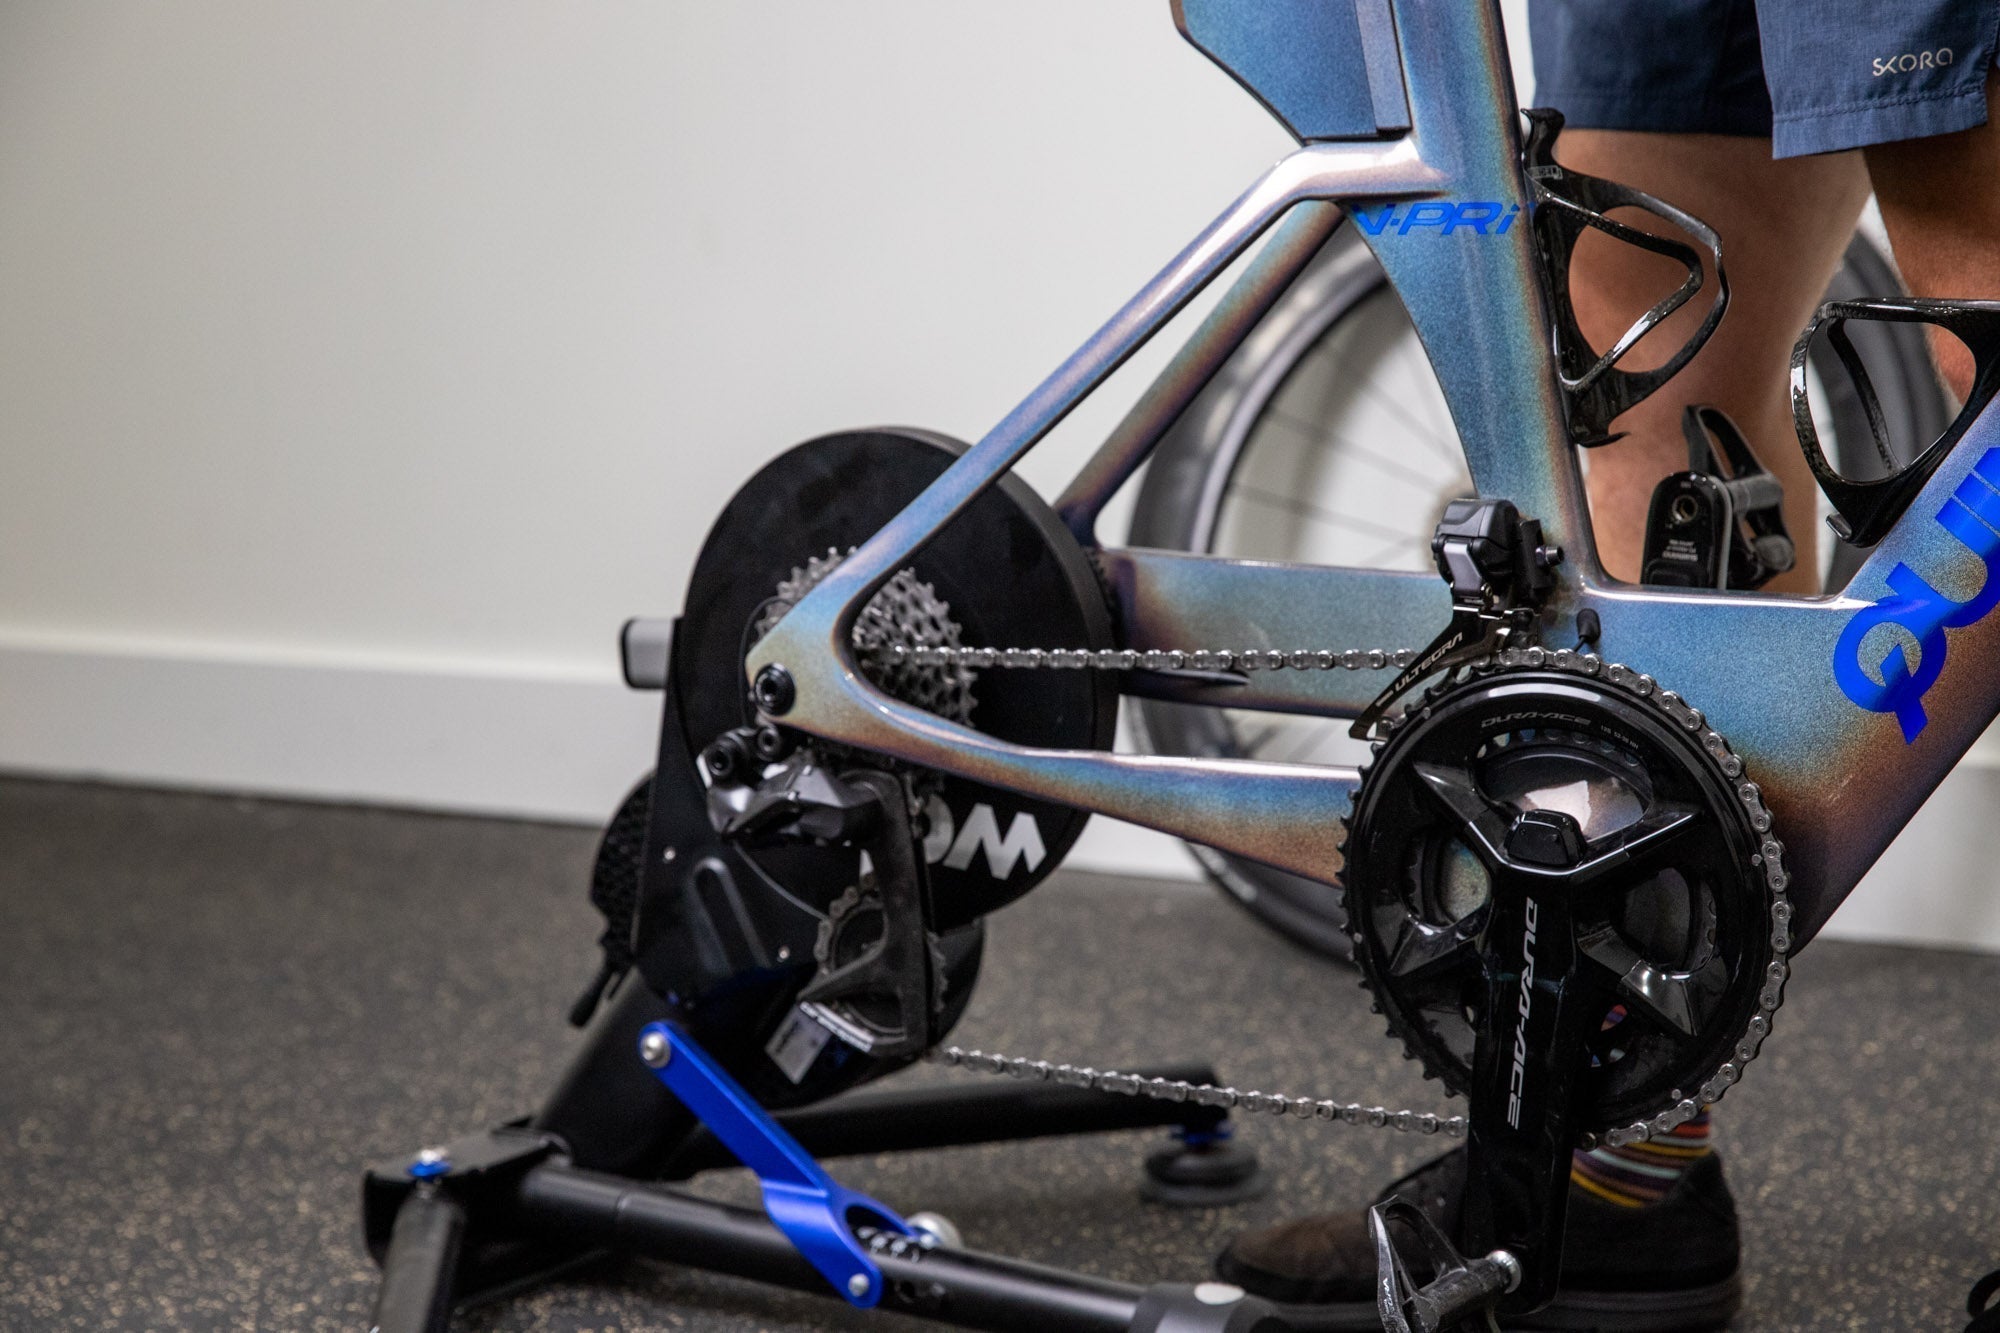
In the video below, we show how to install your Quintana Roo bike onto any direct drive or "wheel-off" trainer:
There are only a few basic steps:
-
-
Shift into the bike's hardest gear
-
Remove the rear thru-axle
-
Remove the rear wheel
-
Place the frame onto the direct drive trainer, ensuring the chain falls onto the cassette and the rear axle dropouts are aligned with the trainer hub end caps.
-
Reinstall the rear thru-axle and tighten.
-
Before mounting your bike, ensure your direct drive trainer has the correct end-caps or adapters installed for 142x12mm rear axle spacing plus a compatible cassette. Please check with your trainer manufacturer if you have any questions.
Mounting a bike to a direct drive trainer is very similar to installing a rear wheel, so if you can do that, you can do this! When installing, you may need to swing the rear derailleur backward to clear the cassette installed on your trainer and direct the chain onto the cassette cogs.
To prevent damage, ensure that the rear axle dropouts of your frame are properly aligned with the endcaps on your trainer before reinstalling the rear thru-axle. Also, make sure the chain is properly routed over the cassette.

Note: Avoid pulling your rear brake lever when installing your bike or while riding your trainer! If you pull your rear brake without the rear wheel/disc rotor installed, it will press the brake pads together. You’ll have to spread the pads back out (with a pad spreader tool or a clean tire lever). If you’re concerned, it might be a good idea to stick a plastic brake pad spacer in your rear brake caliper. These are pretty cheap, but you can also make your own using a small piece of cardboard cut to fit your caliper. Personally, I don’t bother with brake pad spacers. I just remember not to touch the rear brake, but do what works for you!
What Kind of Thru-Axle Do I Need For My Trainer?

Most direct drive or wheel-off trainers can be used with the stock thru-axle included with your QR bike.
If you are using a "wheel-on" trainer, you will need to use a trainer-specific thru-axle compatible with your wheel-on trainer. Please check with your trainer manufacturer if you have any questions.

The rear thru-axle is an E-thru standard M12x1.5 thru-axle made for 12x142mm rear spacing. Trainer thru-axles compatible with QR bikes and many wheel-on trainers are available from The Robert Axle Project.
Wheel-On vs. Wheel-Off Direct Drive Trainers
We tend to prefer direct drive trainers, also known as “wheel-off” trainers. This is the type of trainer shown in our installation video above.
 Direct drive trainers are called “wheel off” because you remove the rear wheel to install your bike on the trainer. Most of these are also “smart” trainers that can measure your power output, automatically adjust resistance, and connect with a smartphone, tablet, or desktop computer to integrate seamlessly with virtual riding platforms like Zwift or TrainerRoad.
“Wheel-on” trainers are an older style of trainer that press a drum against the rear tire to provide resistance. These are generally cheaper, but lack many of the features offered on direct drive trainers.
We tend to recommend that most riders use direct drive trainers because they have several advantages over a “wheel-on” trainer design:
-
More realistic “road feel,” so pedaling feels more like it does outdoors
-
Better resistance control
-
Automatic resistance control for virtual riding
-
Grade simulation for virtual riding
-
Better power meter accuracy
-
Quieter operation
-
Doesn’t slip like a wheel-on trainer can during hard efforts
-
Doesn’t wear out the rear tire
-
Doesn’t require a proprietary trainer axle
However, there are a few downsides to consider with a direct drive trainer:
-
Often more expensive than wheel-on trainers
-
May be heavier or harder to store than wheel-on trainers
-
Requires installing a cassette (sometimes included)

QR pro, Haley Chura, makes use of an older CompuTrainer wheel-on trainer.
Ultimately, the best indoor trainer is the one that fits your budget, space, and needs. A cheaper wheel-on trainer will get the job done for occasional indoor riding. But if you want to get the most out of indoor riding, it’s hard to match the features, ease of use, reliability, and ride feel of a direct drive smart trainer.
What Trainers Are Compatible with Quintana Roo Bikes?

Photo: Wahoo Fitness
The Wahoo KICKR trainer is the trainer we use for fitting, demos, and training at QR headquarters. We have confirmed it to be compatible with all disc brake QR bikes.
However, almost any trainer on the market, especially trainers made by popular and reputable brands like Wahoo, Garmin Tacx, Elite, or Saris, will be compatible with all modern QR models.
If you have any specific trainer questions or concerns, please contact our support team for additional help!
What Trainer Accessories Do You Need?
Your bike and an indoor trainer are all you really need to get started riding indoors, but there are a few key accessories that will make indoor cycling a lot more pleasant:
A powerful blower fan

A Wahoo headwind fan. Photo: Wahoo Fitness
Improving airflow will make a huge difference in your power output and comfort when riding indoors. A basic house fan usually isn’t strong enough to replicate the wind speed you experience when riding outside. What you need is a “blower fan.” These move a lot more air, which will help keep you cooler, drier, and a lot more comfortable, and you can aim the fan at key areas like your chest and neck.
Trainer companies like Wahoo and Tacx make trainer-specific riding fans, but if you want to save money, any blower fan from a hardware store does essentially the same job. I use a basic Lasko pivoting blower fan. If you get extra hot, adding more fans to your setup is an easy way to maximize your performance and power output!
Towels
Even with a good fan, you’re probably going to sweat—A LOT. I like to keep small towels nearby to wipe off my face when it starts dripping. I often drape my towel over the handlebars or on my trainer desk for easy access. They’re also handy for wiping down your bike and floor after your workout (more on that below).
Sweat-proof mat
 Photo: Wahoo Fitness
Expect to get lots of sweat on the floor under your bike and trainer. This can get nasty, especially if you’re on carpet. Most trainer companies also make sweat-proof mats that fit under your bike and trainer, which will protect your floor and make clean-up easier. A sweat-proof yoga mat can work in a pinch, too.
Wheel riser block
Many athletes experience pain or numbness in sensitive areas that they might not experience when riding outdoors. Putting a wheel riser block under the front wheel can alleviate this by leveling out your bike (so it doesn't point downward) and putting you into a riding position where you bear more weight on your sit bones and less weight on your hands and soft tissue.
Nearly every trainer brand makes a riser block. Some make blocks that offer different heights to fine-tune your position. If you want to cheap out, stacking books under the front wheel also works.
Virtual riding app
The biggest value add with any smart trainer is pairing it with an app that will allow you to simulate outdoor riding or execute structured workouts. The two most popular apps on the market are Zwift and TrainerRoad. There are plenty of competitors, too, but I’ll just briefly explain these two options.
Zwift provides a virtual world to ride around in with a large community of users and regular events to participate in. It’s often the best option for riders who want to simulate outdoor riding, gamify the riding experience, or engage socially with other riders.
TrainerRoad is more focused on structured training and gives you workouts to follow on your trainer. It tends to be better for those interested in following a structured training plan because it provides AI coaching, a training calendar that tracks key metrics, and a daily workout selector. It’s also easy to watch TV while doing workouts.
Trainer desk (or equivalent)
Having some sort of desk that keeps your smartphone, tablet, or laptop within reach is super handy. Even if you don't want to stare at a screen, it's nice to have a platform to keep small items or your nutrition and hydration within easy reach.
Trainer desks are specifically designed with indoor riding in mind. The legs are spaced to clear the front wheel of your bike, and the legs are tilted so you can pull the desk portion closer to your handlebars, where it’s easier to reach. If a cycling-specific trainer desk is too pricey, many riders build their own or use low-cost alternatives like music stands.
How to Maintain Your Bike When Riding Indoors

QR pro, Matt Hanson, uses a large towel to protect his cockpit from sweat.
Many athletes ignore cleaning and maintenance because they’re riding inside, but don’t fall into this trap! We’ve seen too many bikes get destroyed due to neglect on the trainer.
The biggest concern when riding indoors is sweat. Sweat will seep into all the cracks and crevices of your bike. It will cause salt build-up and corrode important components like bolts, bearings, cables, and housing. The first thing to do is try to reduce the amount of sweat that gets on your bike by improving airflow (with fans) and using towels. I’m a heavy sweater, and I often drape a towel over my handlebars to catch sweat and prevent it from entering my cockpit. Some companies even make “sweat guards” for this exact purpose.
Always wipe sweat off your bike after workouts, especially any sweat that has pooled in bolts or hardware, or around your cockpit or headset. Give your bike a thorough clean every few rides with a damp towel or with a bike cleaning spray.
When it comes to drivetrain maintenance, you should always keep your drivetrain clean and lubricated. It won’t get as dirty because you’re riding indoors, but it’s worth wiping down your chain and adding lube (remember to wipe away all the excess lube so it doesn’t fling off everywhere!) regularly to reduce drivetrain wear and keep things working smoothly.
Even though you’re riding indoors, it’s also a good idea to keep your tires inflated. Even on a direct drive trainer, you should keep your front tire properly inflated so you’re not bouncing around on a flat tire. This can cause small leaks or punctures, which you might not notice until you go outside to ride!
After a season of indoor riding, make sure to wash your bike and check it over to ensure there’s no corrosion or damage. When washing your bike, remove any handlebar tape or aerobar pads and clean under them. Sweat likes to stick under touchpoints and can damage your cockpit. Replace any corroded bolts or hardware. Remove your seatpost, clean it, and reinstall it with new carbon assembly paste. If you can, check your headset bearings to ensure they aren’t corroded and still spin smoothly.


